Search and Keyword Highlighting
Your administrator may define one or more keywords that are essential to your case. These terms highlight persistently within a case or batch, similar to “permanent” searches. Persistently highlighted keywords can help you find needed information quickly. Note:
-
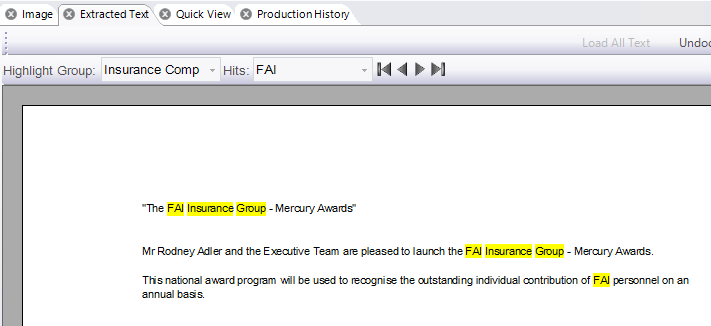
Highlight Groups are sets of related terms as defined by your administrator. For example, a group might include insurance company names or terms.
-
Hits include the specific terms included in a group. For search results, hits match individual terms comprising the search.
-
Color-coding is defined by your administrator for each highlight group.
-
Keywords are highlighted in the following locations:
-
Record View
-
Extracted Text tab
-
Quick View tab
-
Image tab (if word coordinates exist)
-
If a text search has been conducted and the Search Results tab is active in the documents pane, then “Search Terms” and/or "Search Phrases" will be included as groups.
The image below is an example of keywords highlighted in the Extracted Text tab.
View Keywords
To view keywords:
- Read case instructions or contact your administrator to make sure you understand how to use keywords.
-
Visually scan Record View or the Extracted Text, Quick View, or Image tabs for highlighted terms.
-
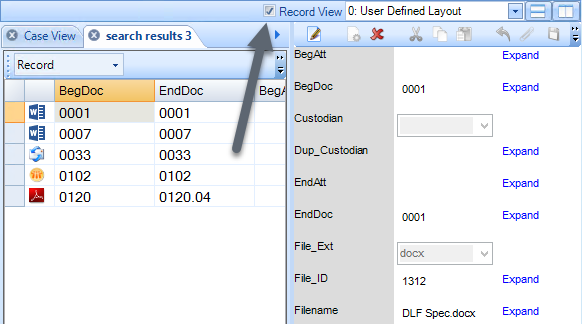
For Record View:
-
Open Record View by selecting the check box marked Record View above the Search Results tabs.

- Scroll to see all fields that might contain highlighted terms.
-
Expand large-text fields and scroll within such fields to find all terms.
-
Change the coding form being used or edit display fields (if you have needed privileges) to view the fields that contain keywords.
-
-
For the Extracted Text or Quick View tabs:
-
Make sure in the Quick View tab the Display Highlights option is selected. This option must be selected to show keyword highlights.

Note: The Display Highlights option is only available in the Quick View tab. Keywords will always appear highlighted in the Extracted Text tab after running a search.
-
Scroll in the tab to see all highlighted terms, or view specific terms as described in the following steps.
-
Select the Highlight Group of interest, then the specific term of interest in the Hits list. The document will go to the first instance of the term.
-
Navigate through all instances of the selected hit using the navigation buttons:

-
-
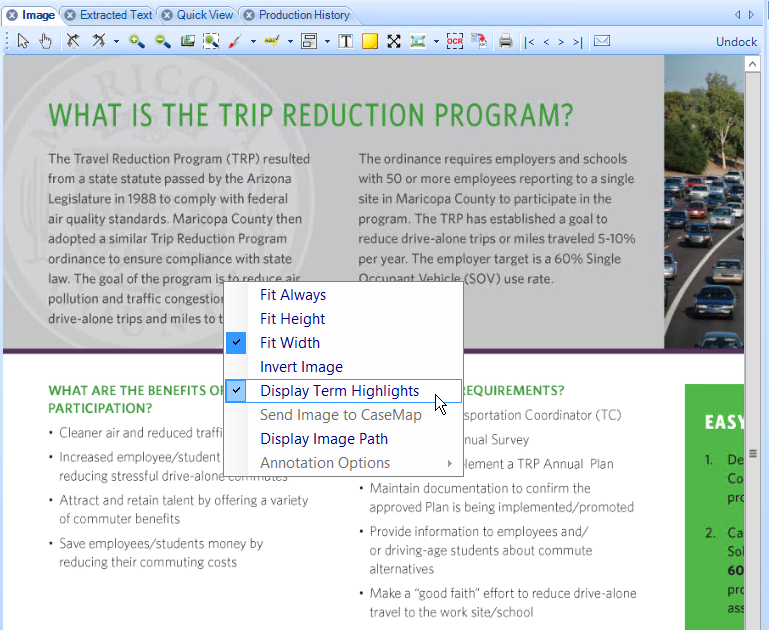
For the Image tab:
-
Scroll in the image to see highlighted terms.
-
If keywords are not needed in the image and you prefer to not see them, right-click and clear the Display Term Highlights option.
-
|
|
NOTE: Navigation buttons work when multiple hits exist and some are not visible in the current tab. If only one hit exists or all hits are visible, then the buttons are inactive. |
Disable Search and/or Search Keyword Highlighting
In some cases, it is helpful to disable search and/or key word highlighting. For example, you might disable these highlights for easier reading or to improve the load time for very large image or native files in the document details pane. To disable either or both types of highlighting in the Image, Extracted Text, and Quick View tabs of all cases in which you are working:
-
Click the Eclipse SE Desktop button in the top-left corner of the Desktop work area and click Settings.
-
Select a type of highlighting to be disabled:
-
Disable Search Term Highlighting
-
Disable Keyword Term Highlighting
NOTE: If you want to remove highlighting only on the Quick View or Image tab, do not use this procedure. You can disable highlighting on these tabs independently. See View Keywords, steps 6 and 7 for more information on how to disable highlighting.
-
-
If needed, repeat steps 1 and 2 to disable the other type of highlighting. Documents will display without the type(s) of highlighting you have disabled.
-
If you are already working in one of the tabs listed above, take one of the following actions to refresh the tab and remove the highlights:
-
Click a different tab in the document details pane (Image, Extracted Text, and Quick View), then click the tab of interest.
- Click a different Search Results tab, then return to the tab of interest.
-
Click the refresh button on the Search bar,
 . Note: this will refresh the entire Eclipse SE session and remove all Search Results tabs, as well as clear search history.
 -
If you have already performed a search, repeat the search.

TIP: If you performed a quick search, click
 on the Search
bar and select the search, then press Enter or click
on the Search
bar and select the search, then press Enter or click  .
.
-

Related Topics:
Last Revision: 6/2/2023
Version: 2019.0.0